

I wrote this workout on a whim because I had a last minute chance to have my amazing friend Jen offer to shoot a workout for me! You can check her skills here! So I got to feel like a real life fitness model as I stood in as her “test subject” as she just moved to a new shared studio space! She got to play with the lighting equipment and I got to pretend I was Jane Fonda 😉 Also I’m 5’10” so I’m pretty long – lets just say I realized why they have such large back drops – especially for any photoshoot involving movement! Thanks Jen for accommodating me and all my lanky limbs! I have since done this workout and let me just say for coming up with it “on a whim” I was pri-tee pleased with it!

Jen is the owner of J.Catherine Photography you can also find her on facebook here!
20-MIN LOWER BODY & CORE WORKOUT
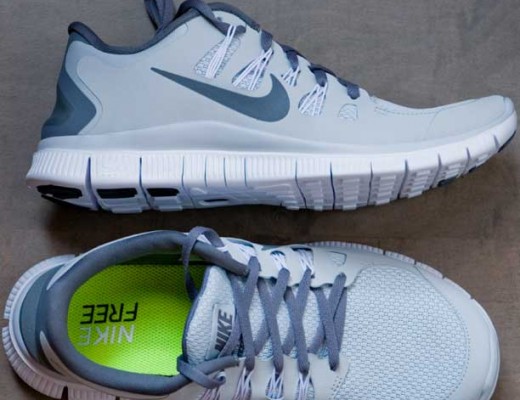
Equipment I Used:
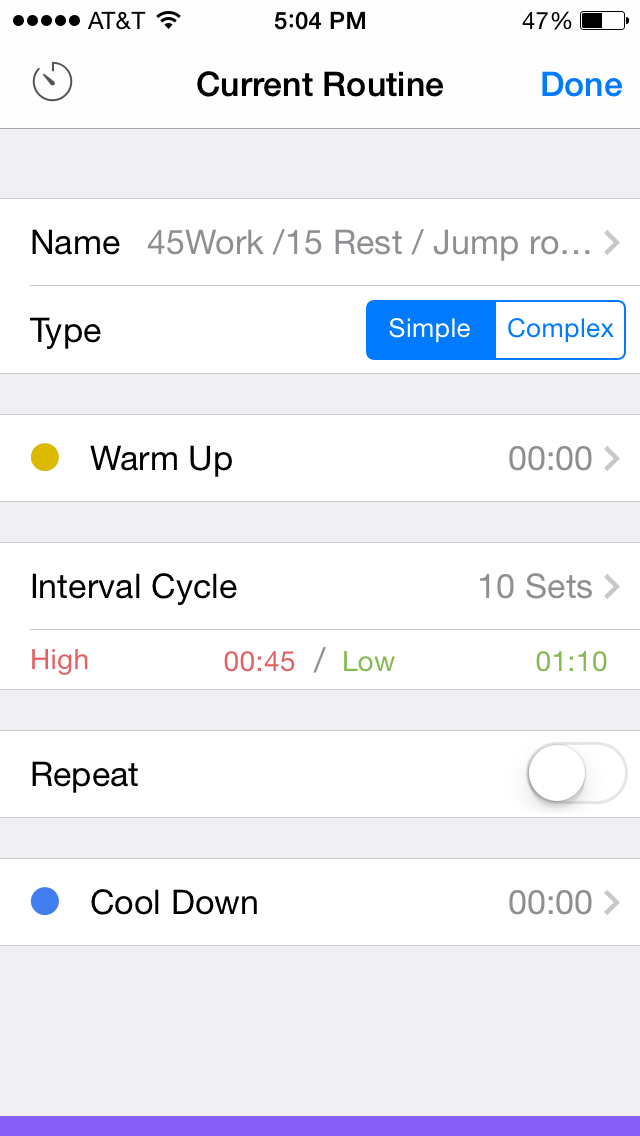
Interval Cycles: 10 Sets
45 seconds of work (High)
1:15 seconds of rest (Low) – ONLY USE 15 SECONDS FOR REST & 1 MIN FOR JUMP ROPE
You’ll do each exercise for 45 seconds followed by 10-15 seconds of rest before moving immediately onto jumping rope (or any cardio activity of your choice – you can hop on the elliptical, do jumping jacks, run on a treadmill, run outside, bike, spin – you get the idea)! When the high interval sound goes off go straight into the next strength exercise! Personally when I did this I just hopped onto an elliptical between each strength move (I thought the gym at my apartment had a jump rope – but I couldn’t find it – and I had left mine in my car). So, I would glance down at my phone as the interval timer counted down and check that I knew which exercise I was going to be doing so I could get right into it!
Also when I did this circuit I actually did it 2 times though for a 40 min workout! The time seriously flew by! If you’re up for the challenge try setting your interval time for 20 Sets for the Interval Cycles. Once you’ve completed the whole circuit, pause the timer, grab some water, and maybe take a breather for 30-60 seconds. Then repeat it again!
I set my interval timer for 20 rounds of 45 seconds of work and 1:10 seconds of rest, and selected different sounds for the high interval vs the low interval so I would know which one was signaling me to start and stop. I used the “Boxing Bell” to signal the High intensity round and the “School Bell” to signal the Low intensity round.
Each round is 20 minutes in length. And like I said if you have the time and you’re up for a challenge repeat the circuit one more time though!! As always, make sure you give yourself atleast 5 – 10 mins to warm up before you start!
Also here are the weights I actually used when I did this circuit:
alternating reverse lunges: single 15 lb DB
side lunge + row to single leg overhead press: pair of 10 lb DB’s
kneeling woodchoppers: single 15 lb DB
front hold reverse lunge to single leg balance: single 20 lb DB
What’s the best weight to use? You should be able to go through the 12-15 reps with proper form, but the last three reps should feel super challenging. Try different weights to see which works best for you… and watch yourself get stronger!

Alternating reverse lunges with torso twist
TARGETS: thighs, core , glutes, and arms
Start by getting yourself in an organized athletic standing position: shoulder blades squeezed back, glutes squeezed, torso tall, belly down and in. Holding any weight of your choice (medicine ball, single DB, pair of DB’s, Kettlebell, or just use your own body weight) in a hammer-curl position with forearms roughly parallel to the ground and thumbs up. Step your right leg behind you, making sure you step back far enough, while keeping your left knee in-line with your left ankle. Your weight should be over your front leg (you’ll you’re your left quad a lot here!). Then twist your torso left, while maintaining your posture (shoulder blades should stay retracted). Finally twist back to the front. Using your left quad and glute to push through, step your right foot back to your starting standing position. Repeat on the opposite side. Continue alternating sides each time!
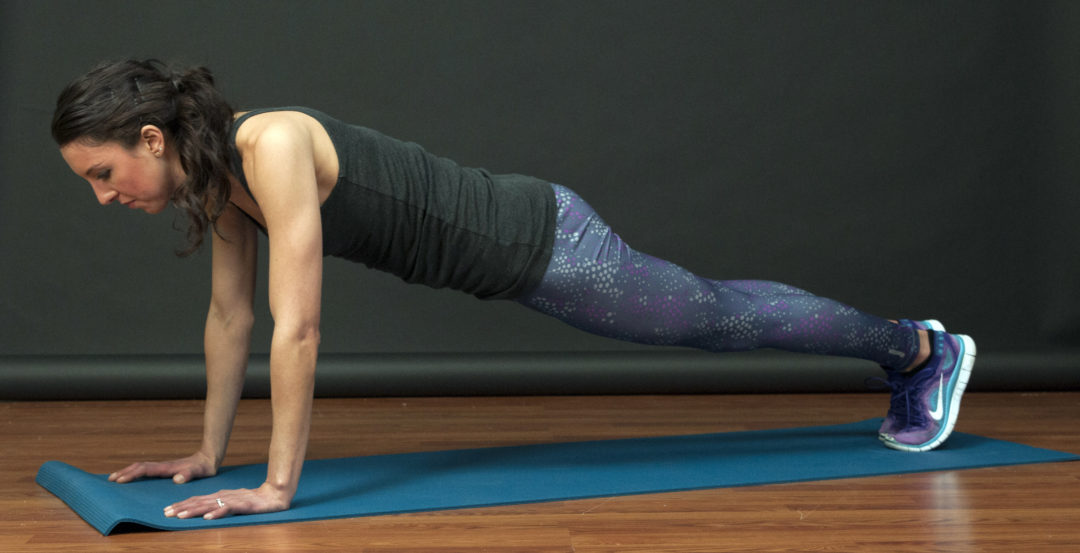
Alternating spider lunges
TARGETS: core, shoulders, and hip flexors
Begin in a plank position: palms on the ground (thinking about screwing your palms into the ground to create torque), shoulder blades retracted, glutes squeezed. A plank is ultimately the same posture you should have when you are standing except you are horizontal instead of vertical – thinking about it this way has helped me! So your spine should be in a fairly straight line. From here bring your right foot up just outside of your right palm. If your hip flexors are tight you will definitively feel this! Contract your left glute for an even deeper hip flexor stretch in the right hip. Return your right foot back to the starting position. Repeat the movement on the opposite side. Continue alternating sides each time.
Side lunge + row to single leg overhead press
TARGETS: upper back, shoulders, and glutes
Start by getting yourself in an organized athletic standing position: shoulder blades squeezed back, glutes squeezed, torso tall, belly down and in. Holding your dumbbells by your side’s palms facing your body. Stop your right foot out to the side keeping your knee in line with your ankle. Sink into that right glute – thinking about shooting at towards the right side of the room. Keep your spine in a neutral position so that your low back is not over arched. Extend your arms down lowering your shoulders toward the ground. Initiating the row as your shoulders squeeze back I’m squeeze your traps (shoulder blades), as you draw the weights dumbbells and towards your rib cage – elbows moving straight back!
Pushing off with your right leg to return to standing position transition into a single (left) leg balance by squeezing your left glute to maintain stability. Hammer curl your way it’s up and into an overhead press keeping your palms facing each other throughout the movement. Perform all reps with the same leg for the duration of the interval. Then repeat the movement on the opposite side for the next one!
Kneeling woodchopper
TARGETS: shoulders, upper back, arms, and glutes
Again in a kneeling position with your right leg in front keeping your knee in line with your ankle. Your shoulder blades should be squeezed back, left glutes is contracted, torso tall, belly down and in, and chin stays in a neutral position throught the movement. Holding your weights with both hands down by your left hip lift them up and across your body up over your right shoulder – in an upward chopping motion. Think as if you were digging and shoveling the dirt over your right shoulder! Return the weight to starting position next to your left hip. Your torso will twist slightly but it shouldn’t be excessive. Be sure to maintain your posture (avoid overarching your low back by contracting your left glute throughout the movement). Perform all reps with the same leg in front for the duration of the interval. Then repeat the movement on the opposite side for the next one!
Front hold reverse lunge to single leg balance
TARGETS: quads, glutes, upper back, shoulders, and core
Start by getting yourself in an organized athletic standing position: shoulder blades squeezed back, glutes squeezed, torso tall, belly down and in. Holding your dumbbells in a front hold – this requires that your shoulder blades stay actively retracted throughout the movement (which is a bonus for you core and upper back muscles)! Step your right leg behind you, making sure you step back far enough, while keeping your left knee in-line with your left ankle. Your weight should be over your front leg (you’ll you’re your left quad a lot here!). Transition into a right-leg balance standing position by pushing off slightly with your back (right) foot, keeping your weight on your left leg, squeezing your left glute to create a stable position, as you draw your right knee upwards to balance. The front hold should be maintained throughout the movement. Perform all reps with the same leg in front for the duration of the interval. Then repeat the movement on the opposite side for the next one!
Side plank with a front kick & reach
TARGETS: obliques, shoulders, and core
Begin in a side plank position: right forearm on the ground. Shoulder blades retracted, shoulders down and back, glutes squeezed, belly down and in. You can have your feet stacked (as shown in the pic) or they can be staggered. Extend your left arm overhead so that it is in line with your body. Kick your top (left) leg out in front of you while drawing your extended left arm out reaching for your toes. Try and keep your hips up thoughout the movement!

1 Comment
Engrid from Liveng Proof | Head Shots ~ Greenville SC Photographer » J Catherine Photography Blog
February 2, 2015 at 3:53 pm[…] for most. It’s even scarier to walk into a gym and not have a clue what to do. Head over to Liveng Proof to see a simple and straight forward workout you can do at home to get you started towards a […]